
I’ve somewhat neglected the Sewing Guides category on this blog lately, so sorry about that! I’ve not had a whole lot of time to machine-sew this past year but I plan to get back into it, starting today with this guide to sewing your own lingerie storage bags.
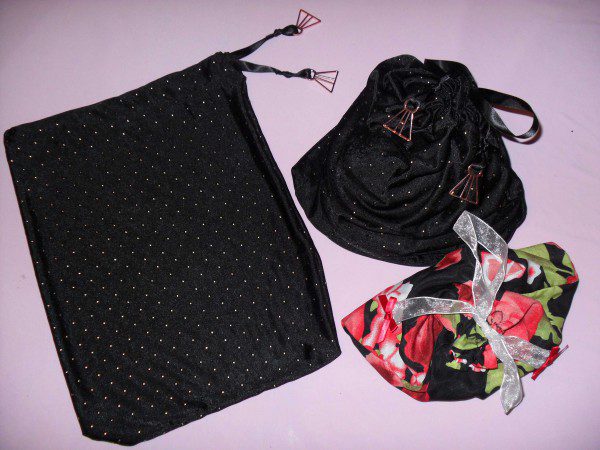
I wrote about lingerie bags here as a really great, space-efficient storage method for your smalls. They take up basically no more space than the lingerie would in your drawer, but protect delicate fabrics from snagging and also allow you to keep things neatly organised.
Lingerie bags also make a lovely gift for the lingerie addict whose size you’re not sure of (which is actually how this tutorial came about – realising on Friday night that I needed a birthday gift for Saturday morning and all the shops were shut!).
Difficulty level
Easy.
This tutorial is designed for the beginner sewer, so it’s a very simple bag with no lining and minimal decoration. That also makes it quick and easy to do – great if you’re making a whole bunch of them! All you need to know really is how to sew a straight line on a sewing machine – you could even hand-sew one of these bags if you’re patient enough.
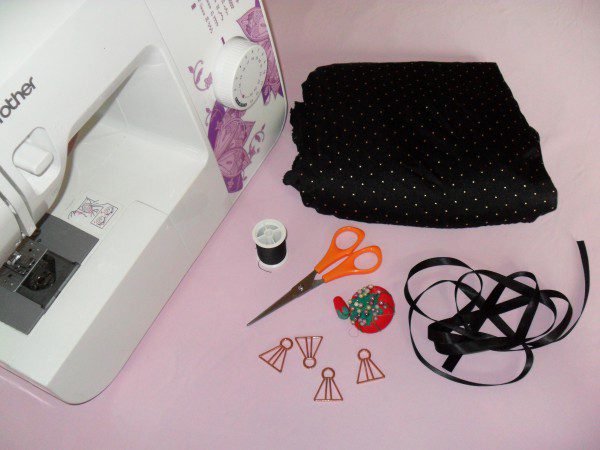
What you’ll need
Fabric
You can use more or less any fabric to sew these bags, though if you’re new to sewing a stiff cotton or thick jersey is probably the easiest to work with. Your piece of fabric should be a little taller than you want your bag to be (to allow for seams) and a little over double the width (as you will be folding it in half).
Thread
Pins
Scissors
Ribbon or cord
Safety pin or beads
Instructions
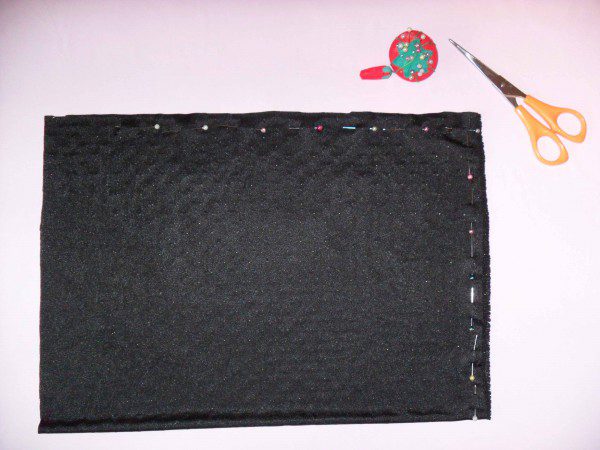
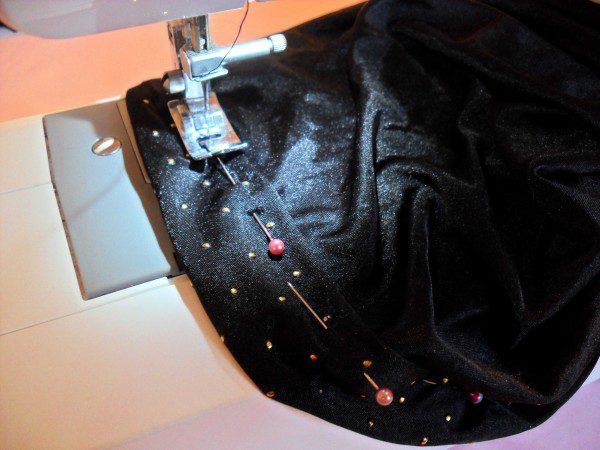
Step 1 – fold your piece of fabric in half widthways with the front of the fabric (the side you want showing on the outside of your bag) facing inwards. Line up the edges and pin along the long side and one short one.
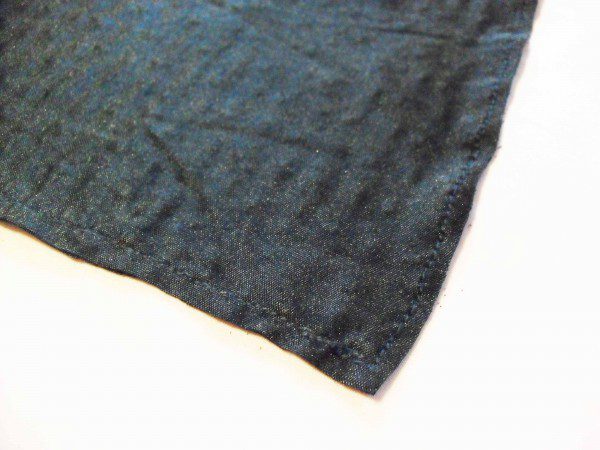
Step 2 – starting where it joins the folded edge, sew a straight line up the short side about 1/2cm or 1cm in from the edge. Then sew from there up along the long pinned side, stopping when you get to about 3 inches away from the end.
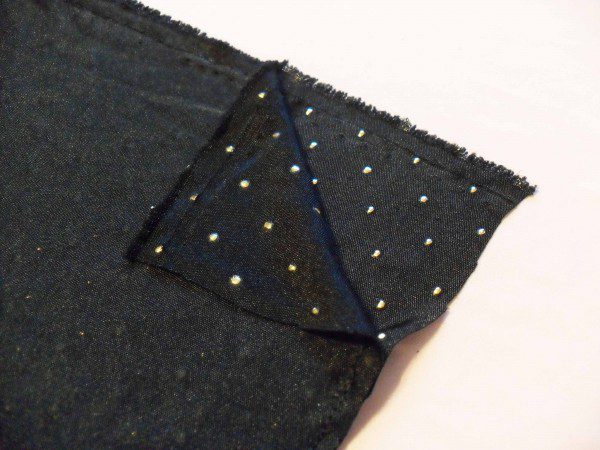
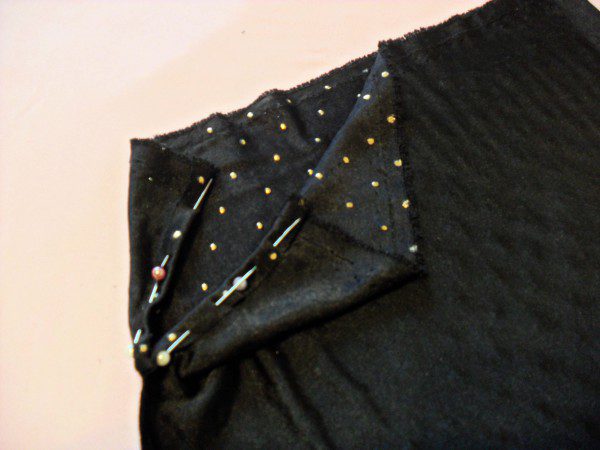
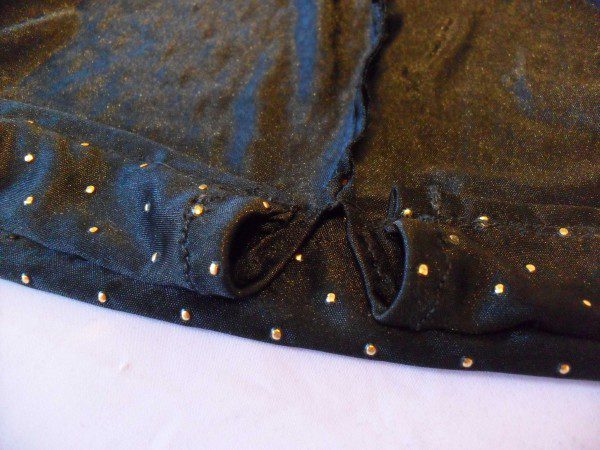
Step 3 – Now take that end piece that you didn’t sew closed, fold it back on itself about 1/2cm and pin in place as pictured below. You can fold it over a second time before pinning to hide the raw edge if you want to – this will reduce fraying if you’re not using a non-fray fabric. Repeat for the other side and then sew in place.
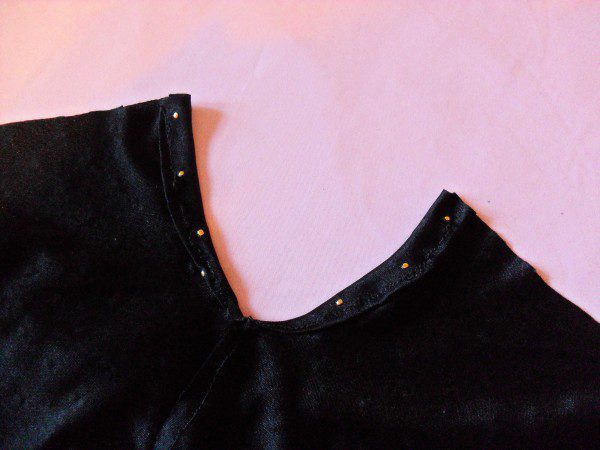
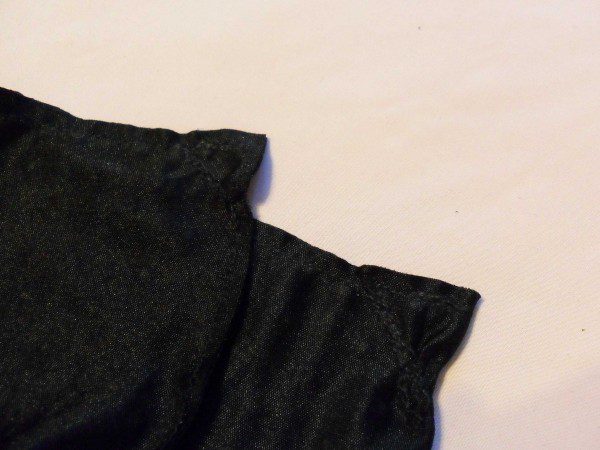
Step 4 – Fold the top (open) edge of your bag back on itself by about 1/2cm. You can either sew this in place as I have done below, or if you can iron the fold in place if you’re using a fabric that will allow you to (this springy satin jersey wasn’t going to be creased by anything!).
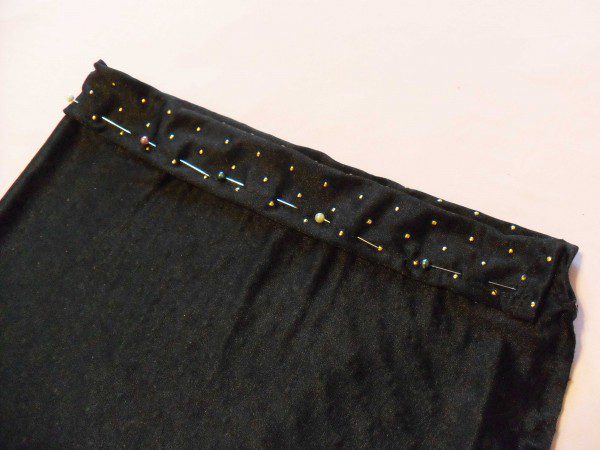
Step 5 – Now you’re going to make the channel for your drawstring to run through. Fold that top edge over again, but this time enough that it lines up with the start of the seam on the long side. Pin in place and then sew a straight line of stitches about 1″ in from the top edge of the bag.
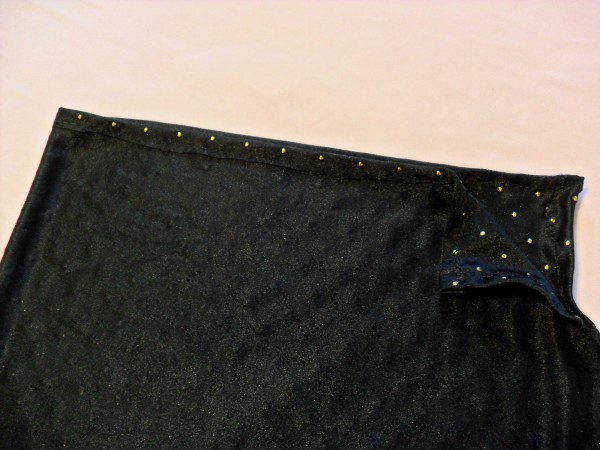
Step 6 (optional) – If you want to strengthen the bottom corners (not really necessary, but useful if you’ll be hanging these bags with heavier items like corsets inside, which will put weight on the bottom of the bag), you can sew a diagonal line across the two bottom corners as pictured below.
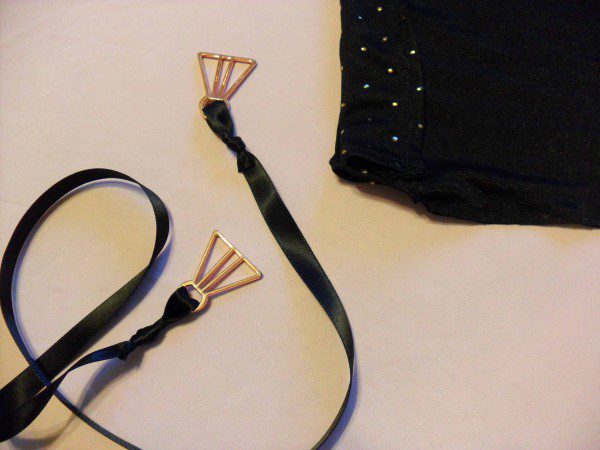
Step 7 – Now all you need to do is add your drawstring! You’ll need to thread the ribbon all the way through the channel so you’ll need something hard on the end that you can grip through the fabric and pull along to the end. You can use a safety pin for this, or if you want to add some pretty beads to the end of your ribbon these will do the trick too.
To finish, simply turn your bag inside out so that the outer fabric is, well, the outer, and you’re all ready to start filling it up with pretty lingerie! Speaking of which, you’ll have the chance to win one of these bags complete with mystery lingerie contents over on Instagram very soon – follow me @estylingerie to know when the competition launches.
I hope you found this tutorial useful and if you make your own drawstring lingerie storage bags after reading it, I’d love to see a picture – email one in to info@estylingerie.com and it may be featured on our How to Make Lingerie page!
